Restoring Entire VMs into vSphere Infrastructure

You can restore vCloud Director VMs from the backup to the VMware vSphere infrastructure.

During restore, Veeam Backup & Replication neglects the vApp metadata saved to the backup file and performs a regular entire VM restore process. The VM is restored to the vCenter Server or ESXi host and is not registered in vCloud Director. vCloud-specific features such as fast provisioning are not supported for such type of restore.

To launch the Full VM Restore wizard, do one of the following:

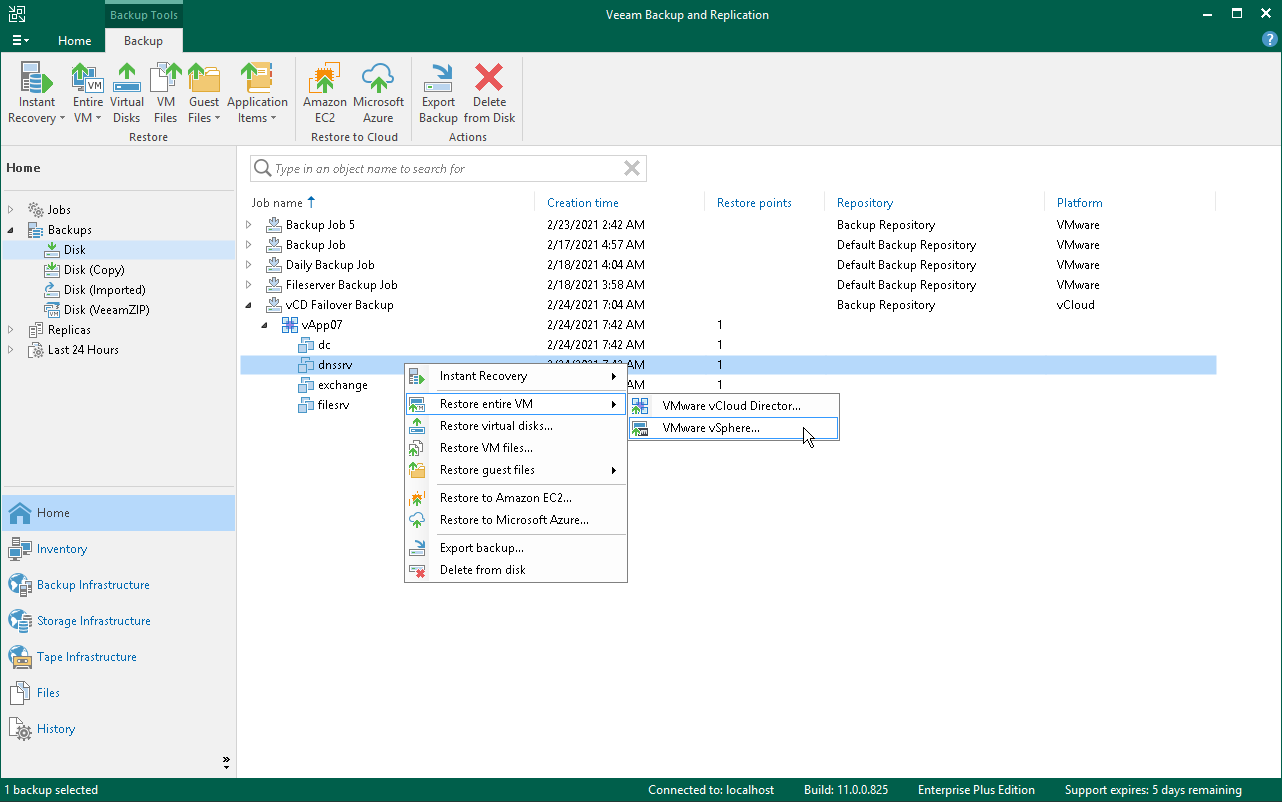
  • Open the Home view, in the inventory pane select Backups. In the working area, expand the necessary backup, select the VMs you want to restore and click Entire VM > VMware vSphere on the ribbon.
  • Open the Inventory view. In the inventory pane, expand the vCloud Director hierarchy and select the vCenter Server. In the working area, right-click the VM you want to restore and select Restore entire VM > VMware vSphere.

Entire VM restore of vCloud Director VMs does not differ from entire VM restore of regular VMware VMs. For more information, see Performing Entire VM Restore.

Restoring Entire VMs into vSphere Infrastructure


Esportazioni Profili Outlook

Esportare il profilo (account) di Microsoft Outlook (XP, 2003, 2007, 2010, 2013, 2016, 2019, 365) e riconfigurazione in pochi passaggi

1 – Esportare la chiave del registro di sistema contenente le informazioni degli account di posta.
Apriamo il registro di sistema,
Start -> Esegui -> scriviamo “Regedit” e poi premiamo Ok (In Windows Xp e precedenti)
Start -> nel campo di testo scriviamo “Regedit” e poi battiamo Invio (Windows Vista e Windows 7)
Start -> scriviamo “Regedit”, nel campo di ricerca ci viene suggerito il programma corretto, premiamo ok (Windows 8, Windows 10)

e spostiamoci al seguente path:

HKEY_CURRENT_USER -> Software -> Microsoft -> Windows NT -> CurrentVersion -> Windows Messaging Subsystem -> Profiles (Outlook fino 2010)

HKEY_CURRENT_USER -> Software -> Microsoft -> Office -> Outlook -> 15.0 -> Profiles (Outlook 2013)

HKEY_CURRENT_USER -> Software -> Microsoft -> Office -> Outlook -> 15.0 -> Profiles (Outlook 2016)

Tasto destro su Profiles, scegliamo esporta, diamo un nome qualsiasi e salviamo la chiava dove più ci viene comodo.

2 – Fare una copia di tutti i files di dati (.pst) contenenti la posta già scaricata archiviata e inviata.
Start -> Pannello di controllo -> Posta elettronica -> Mostra profili

3 – Riposizionare i file di dati (opzionale)
Sul nuovo pc, riposizionate le cartelle contenenti i file di dati dove le avete prese in precedenza.

4 – Importazione profilo
Fare un doppio click sulla chiave di registro precedentemente esportata e rispondere affermativamente alle successive domande.

Aprite microsoft outlook:
Se avete eseguito il punto 3 l’unica cosa che vi verrà chiesta è la password per ogni account importato
Se non avete eseguito il punto 3, outlook vi chiederà dove risiedono i file di dati per ogni account importato. Niente paura! Indicategli dove avete messo i file, avrà bisogno di un riavvio, vi chiederà le password degli account e poi funzionerà tutto correttamente.

Pagentry

CREAZIONE AZIENDA

VERIFICHIAMO IL PROGRESSIVO

INSERIRE NUMERO CODICE MANUALMENTE, e premiamo invio

PREMERE + PER CREAZIONE ANAGRAFICA

SALVA, SALVA

INSERIAMO L‘UTENTE ALL’INTERNO DEL GRUPPO PAGENTRY

SELEZIONIAMO PAGENTRY

01578890236_6711

ASSOCIAMO LA MAIL (TSID) ALL’UTENTE DELL’AZIENDA APPENA CREATA

SELEZIONARE TS ID E MY SUPPORT